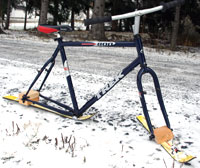
Want to have some fun this winter? Then you might want to make your own ski bike!

First of all, let me point out that building and using one of these contraptions is extremely dangerous! Do not try this at home kids!
I have seen a number of tutorials about making your own “ski bike” from spare bike parts and skis, and it looks like a lot of fun, so I decided to make one myself. Here’s how it went down:
This Trek 800 has gone from my preferred training/racing bike, to a winter bike, to a commuter, and to a single-speed conversion. It’s only logical that a “ski bike” is the next step.
For this project, you will need:
- An old mountain bike.
- 2 old downhill skis. (If you don’t have any, try Craigslist or a buddy that works at a ski shop.)
- Front and rear QR skewers. (Hopefully that old MTB had a wheelset…)
- Grips or bar tape of some sort. (Ever tried holding wet metal bars in the winter?)
- A length of 2×4 (16″ should be enough.)
- 8 1 5/8″ wood screws
- 4 2 1/2″ wood screws
- Drill press (or a drill and long drill bit.)
- Hacksaw

Step One: Find an old mountain bike.
Ideally you have an old mountain bike sitting around. You will need a frame, rigid fork, seat, seatpost, headset, stem, and handlebars.

Step Two: Strip it down.
Strip off the parts until you have the frame, fork, headset, stem, bars, seat, and seatpost together. Ditch the other parts, especially the brakes, cables, and drivetrain. Position the seat low and the bars high for better control.
Keep the quick-release skewers, though, you’ll need them later.


Step Three: Cut wood for the dropouts.
Basically you are making your own hubs out of wood chunks…
Measure the width of the front dropout, and cut a length of 2×4 to the same width. Assuming you have the standard 100mm dropouts, you should cut a piece of wood that is 4″ long. Do the same for the rear dropouts, but cut two pieces of 2×4 to this width; each of which should be 135mm (or about 5 1/4″.)

Step Four: Drill some holes.
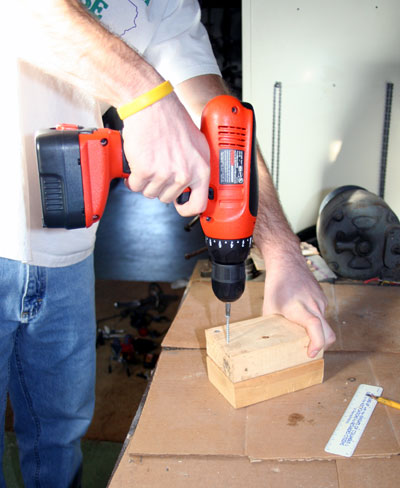
If you have access to a drill press, this is a good time to use it! You need to drill a hole clean through the 4″ length of the front block and the 5 1/4″ length of a rear block. This hole is going to be where the skewer runs through and attaches the ski to the dropouts, so make sure you use a drill bit that is at least as big as the skewer.
To decide where to drill the holes, position each block of wood between the dropouts. When you have wedged it in there as cleanly as possible, mark the spot where the quick-release will go. Each block must be done separately because they’ll only fit in so far due to changes in frame/fork tubing dimensions.
Now, drill two long, straight holes. Easier said than done… Either use a drill press (preferred), a long drill bit (decent), or drill in from both sides so the holes line up (tricky).

Step Five: Make the rear block.
Grab the two 2x4s that you cut for the rear dropout (one of which has a hole down it.) Using the 2 1/2″ wood screws, attach the two pieces together with one screw just on the inside of each corner. Just don’t put one through the skewer’s opening!
Now you should have a stack of two 2x4s with a skewer running through the top one. The extra 2×4 is used to raise the back of the bike so that the skis sit at the same level.

Step Six: Cut the skis.
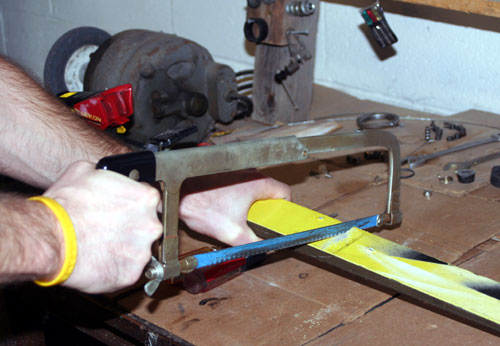
Cut the skis to your desired length. I used two feet for the front ski. (Just make sure it doesn’t hit the tip of the rear ski.)
To determine the length of the rear ski, place it so that it runs under the rear dropouts and the bottom bracket shell, with the base of the curved tip sitting just in front of the BB shell. Mark the ski directly beneath the rear dropouts. Measure one foot back from that mark, and cut there. Use a hacksaw so you can cut the fiberglass and metal sections.
Be sure to leave the curved tips on the skis, as they will face forward just like if you were skiing.

Step Seven: Prep the front ski.
Find the midpoint of the front ski and drill four holes in a square pattern. This is where you’ll attach the 2×4.
In order to keep a smooth base on the ski, you can countersink the holes. Just use a larger drill bit to take off a little extra of the ski’s plastic base around each hole.
Now center the front block of 2×4 over the holes in the ski, and install the screws. (They will go up through the ski and into the wood.)
Note: Since skis have a thin metal layer in them, I started by drilling a small hole down to this layer. Then, to save some wear and tear on my drill bits, I used a hammer and nail to punch through the metal. Then I finished with the drill.

Step Eight: Prep the rear ski.
Find the spot on the rear ski where you marked the dropouts – drill a set of holes there just as you did on the front ski. Screw it to the base of the 2×4 stack (the undrilled block is the base) in the same fashion.

Step Nine: Attach skis to bike.
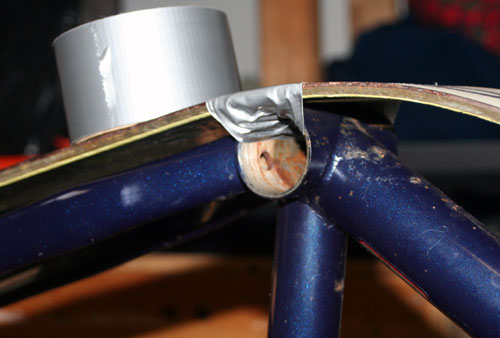
Put the skewers through their holes, and put the ski assemblies into the dropouts. Then tighten down the skewers.
To keep the rear ski in place, you can put a strip of duct tape around the ski and through the BB shell. However, that slows things down a bit, plus the tape rips eventually, so I prefer to let the ski “float” against the BB shell and it works just fine.

Step Ten: Adjustments.
Check over everything to be sure it’s tight. Also, sit on the bike and check if the bar height is comfortable.
Then you can ride it like that or customize it further, perhaps by adding some foot pegs.

Congratulations, you have a homemade ski bike!
Did I mention this is dangerous? It is. So don’t try this at home… or at least wear some protective gear, because you could get hurt!
Update!! Want to see it in action? Coach Levi has some cool pics of some ski bike action.
Levi Bloom is an experienced endurance athlete who has been training and competing for over 17 years. A former Cat 1 road and mountain bike racer (professional class on the regional circuit), he is now a cycling coach (USA Cycling Level 3 Certified) and sports nutrition coach (Precision Nutrition Level 1 Certified).


Leave a Reply